Complete 250 cm2
AEM Water Electrolyzer
Original price was: $20,098.00.$18,271.00Current price is: $18,271.00.
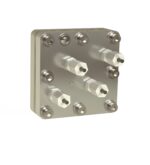
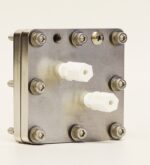
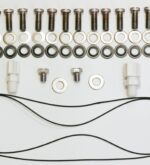
A complete alkaline anion exchange membrane water electrolyzer. The unit includes corrosion resistant 250 cm2 anode and cathode flow fields, an MEA with base metal catalysts, metal gas diffusion layers, o-ring seals, and Teflon gasketing. No heaters or cabling included.
The electrolyzer is designed to be run with 1 M KOH flowing on the anode and cathode as described in Zengcai Liu et al. “The effect of membrane on an alkaline water electrolyzer” https://doi.org/10.1016/j.ijhydene.2017.10.050
Note: The electrolyzer is built when the order is received. It generally takes up to 5 business days to build and test the unit before shipment.
Description
This alkaline water electrolyzer shows record performance because it contains Sustainion® anion exchange membranes
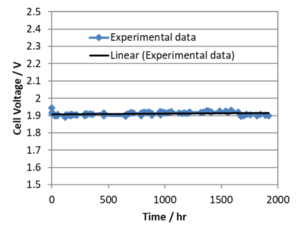
- It operates at high currents: 1 A/cm2 at about 1.9 V at 60 °C in flowing 1 M KOH.
- There is no need for precious metals.
- The electrolyzer can be rapidly turned on and turned off.
- The electrolyzer design allows one to replace PEM electrolyzers with alkaline water electrolyzers and get similar performance.
Instructions for use
Initial set up for DM Alkaline Water Electrolyzer Cell
- System set up (recommended)
Typically, the system setup uses a peristaltic pump to meter a 1M KOH solution that is split evenly to both the anode and cathode from a common solution reservoir with two separate gas disengagements (Figure 1). The total pump flowrate is about 50 mL/min. The suggested tubing used is a 1/4” OD, 1/8” ID PTFE tubing. The length of tubing after the split into the two flow streams into the two electrode compartments should be at least 8 inches (20 cm) on each side in order to reduce the amount of current leakage (or shunt current) between the anode and cathode. The exit liquid streams with gases from the two electrode compartments are separately routed to the gas disengager which allows the liquid to drop into the separate sections, so the two product gases are not mixed together. Meanwhile gas disengager also acts as a current break. - Fluid Connections
The fluid inlet and outlet ports are located in the center of the cell (Figure 2). Connect the PTFE tubing (1/4” OD) from the pump to the compression fitting located at the bottom; connect another PTFE tubing (1/4” OD) from the gas disengage to the compression fitting at the top; and tighten the nut with fingers. Repeat this for the other side of the cell. - Power Connections
Locate the threaded hole for wire connection on top of the cell (smaller through-hole 8-32 thread). Then connect the ring terminal with the Phillips round head screw. Use this same procedure for both anode and cathode.Figure 1. The electrolyzer setup
Figure 2. Diagram of the 25 cm2 cell
Cell Testing and Operation
Begin pumping a 1M KOH solution from bottom connection of the solution reservoir and gas disengager at a rate of 50 mL/min which is split into two flow streams, one going to inlet of the anode chamber and the other to the cathode chamber. Then begin heating the cell by turning on the temperature controller and setting the temperature to 60°C (heaters sold separately) and holding the temperature at 60°C for at least 30 min before applying current. Connect the anode electrical lead (red) and cathode lead (black) to the positive and negative connections, respectively, on the power supply with electric wires/cables (not included). Set the power supply voltage at 2.2V and slowly begin increasing the current to a setting of 25 A (1A/cm2). The cell current will reach the desired 25A in a few min or hours depending on the cell membrane and electrode conditioning. Testing can also be done with potentiostat, but the connections depend on the testing protocol
You may also like…
-
Sale!
Sustainion® X37-50 Grade RT Membrane
Price range: $28.00 through $6,059.00 Add to Cart This product has multiple variants. The options may be chosen on the product page


